
How to Preserve Butterfly Specimens: A 2026 Guide
Table of Contents
- What You'll Need to Preserve Butterfly Specimens
- Best Tools for Pinning Butterflies
- How to Rehydrate Butterfly Specimens
- Step-by-Step Pinning and Positioning
- Drying, Curing, and Long-Term Storage
- Alternatives to Standard Glass for Framing Insects
- Troubleshooting Common Mistakes and Ethical Sourcing
- Frequently Asked Questions
Last Updated: September 14, 2026
What You'll Need to Preserve Butterfly Specimens
Preserving butterfly specimens is the practice of rehydrating, pinning, drying and storing Lepidoptera so their wings, antennae and abdomen keep their shape for decades. This guide from Newman Art Designs covers the full process, from relaxing chamber to display case, plus the ethical and legal checks most guides skip.

The single biggest reason home preservation fails is impatience. Wings get forced before the thorax is pliable, scales rub off, and the specimen is ruined in under a minute. Get the preparation right and everything after it is straightforward.
Butterflies are insects in the order Lepidoptera, and their scales are what make preservation delicate: every touch on a dry wing lifts colour with it. Before collecting anything, check your obligations under the Environment Protection and Biodiversity Conservation Act and your state or territory wildlife authority, because native species are protected and permits apply.
Here's what you need on the bench:
- A spreading board with a groove sized to the specimen's thorax
- Entomology pins (stainless steel, sizes 1-3) plus micropins for bracing
- Fine-pointed forceps and a pinning block for consistent pin heights
- Parchment paper or tracing paper strips for holding wings flat
- A relaxing chamber, desiccant, and an air-tight display case
Best Tools for Pinning Butterflies
The best tools for pinning butterflies are a foam or cork spreading board, stainless entomology pins, fine forceps and a pinning block. Skip craft pins: they rust, and rust stains the specimen permanently.
What most guides miss is that board material matters more than brand. Soft foam lets pins drift as the specimen dries, which pulls wings out of alignment overnight. Cork or balsa holds a pin exactly where you set it. Forceps should be fine-tipped and slightly curved; blunt tweezers crush the thorax and snap antennae.
- Spreading board: groove depth matched to abdomen size, adjustable sides
- Pins: stainless steel, one size down for small species
- Pinning block: three heights for body, labels and wings
- Forceps: fine, curved tips for antennae and legs
How to Rehydrate Butterfly Specimens
To rehydrate butterfly specimens, place them in a sealed container over damp paper towel or sand for 24 to 72 hours until the thorax and wing joints move freely. Never wet the specimen directly.
A simple relaxing chamber is a sealed plastic tub with a layer of damp (not dripping) sand or folded paper towel, plus a few drops of phenol or a pinch of mould inhibitor to stop fungus. Set the specimen on a small platform above the moisture so it absorbs humidity without touching water. Small species relax in a day; large or long-stored specimens can take three.
If you're working with a specimen that's been dried for years, check pliability gently at the wing base each day. Forcing a stiff joint cracks the thorax, and there's no repair for that.
Step-by-Step Pinning and Positioning
- Insert a single entomology pin through the centre of the thorax, slightly right of the midline, so the pin exits below without splitting the body.
- Push the pin into the board groove until the wings sit level with the board surface, using the pinning block to set height.
- Slide a parchment strip over each wing and pin it down lightly to hold the wings in position.
- Draw the forewings forward until the trailing edge sits square to the body, then pin the strip.
- Bring the hindwings up so their leading edge tucks just under the forewings, and pin again.
- Adjust antennae with forceps so they sit symmetrical and clear of the wings.
- Leave the strips in place and do not touch the specimen again until it is fully dry.
Drying, Curing, and Long-Term Storage
Drying is the stage where a well-pinned specimen either sets permanently or quietly fails. The wings must lose moisture slowly enough that the membranes do not warp, but fast enough that mould never gets a foothold. Most practitioners find that a warm, dry, dust-free spot out of direct sun, with gentle air movement, cures a medium-sized butterfly in one to three weeks. Larger species and specimens with thick abdomens can take longer; small blues and skippers may be ready in under a week.
Humidity is the enemy. In a damp room, specimens can grow mould before they cure, and mould eats the scales from the underside up, leaving a dull, patchy wing that cannot be restored. If you live in a humid climate, run the drying area with a small dehumidifier or place the board near (not in) a draught-free spot with consistent airflow. Do not use direct heat, a hair dryer or radiator will cook the specimen and make the wings brittle.
How to tell a specimen is fully cured
- The abdomen is rigid and does not flex when the pin is gently rotated.
- The wing bases no longer move if you breathe on them.
- The antennae hold their shape without drooping.
- There is no lingering smell of decay from the thorax.
Once cured, remove the parchment strips and transfer the specimen to its long-term home. The choice of enclosure does most of the preservation work from here on.
Storage and display options
- Air-tight display case or shadowbox: the default for home collections. Add a small sachet of silica desiccant to absorb residual moisture, and refresh it every few months in humid conditions.
- Glass dome: seals well against dust and pests, ideal for a single statement piece, but heavy and easy to knock over.
- Sealed drawers or specimen boxes: the museum standard for larger collections. Line with acid-free foam or plastazote, and keep a pest strip or desiccant sachet in each drawer.
- Open frames: avoid for anything you care about. Dust, humidity swings and dermestid beetles all get in.
Light, pests and the two things that destroy collections
UV light fades wing pigments, and the damage is cumulative and irreversible. Keep cases out of direct sun and away from halogen or unfiltered LED spotlights. If a display must sit in a bright room, choose UV-filtering glass or acrylic.
Pests are the other long-term threat. Dermestid beetles, clothes moths and booklice will happily eat dried insect tissue, and an infestation can spread through a whole collection in weeks. The standard defence is a freeze cycle: seal any new, second-hand or field-collected specimen in an air-tight bag and freeze it for at least 72 hours, then thaw it fully at room temperature before pinning. This kills larvae and eggs without damaging the specimen. Repeat the freeze for any specimen that has been stored outside a sealed case.
Check stored specimens every few months. Look for fine dust under the abdomen (frass), tiny cast skins, or antennae and legs that have gone missing. If you find live pests, isolate the affected drawer immediately, freeze everything in it, and clean the storage area before returning the specimens.
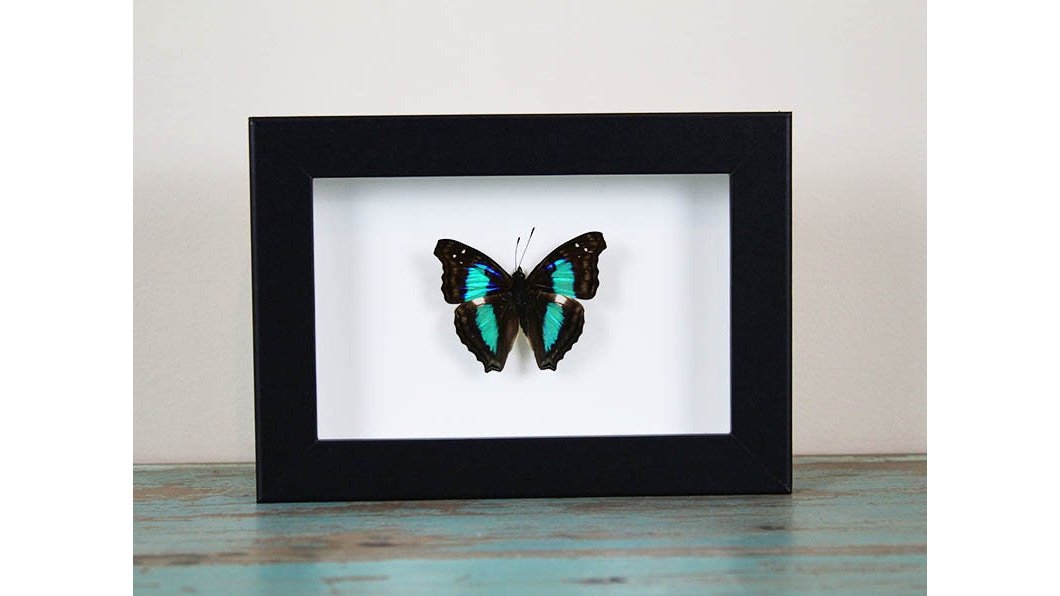
Framed pieces from Newman Art Designs are sealed in shadowbox frames or glass domes specifically so humidity swings and pests stay outside where they belong, and the seal is what keeps colour and structure intact for years rather than months.
Alternatives to Standard Glass for Framing Insects
Standard glass is not the only option for framing insects, and often not the best one. Glass is heavy, shatters in transit, and offers no UV protection unless treated.
- Acrylic (perspex): lighter and shatter-resistant, good for wall-mounted shadowboxes, but scratches easily
- UV-filtering glass: blocks the light wavelengths that fade pigments, the pick for valuable specimens
- Glass domes: seal well against dust and pests, ideal for a single statement piece
- Sealed shadowbox frames: combine depth for the specimen with a dust-tight seal
For most home displays, an air-tight shadowbox or dome beats an open frame. The seal does the preservation work, and the enclosure does the decorating.
Troubleshooting Common Mistakes and Ethical Sourcing
Most preservation failures trace to four mistakes: pinning too soon, touching dry wings, storing in humid air, and skipping pest control. Each is avoidable with patience and a sealed case. But the failures that actually end a specimen's life, a snapped antenna, a cracked thorax, a wing that tears at the base, are the ones most guides never mention. This section covers both the fixes and the legal and ethical side of collecting.
Repairing common damage
- Broken antenna: reattach with a tiny dot of water-soluble archival adhesive on the tip of a fine pin, or pin a sliver of card under the antenna to support it while it sets. Never use superglue, it fogs, yellows and is permanent.
- Torn wing: if the tear is clean and the specimen is still relaxed, align the edges with forceps and hold them flat under a parchment strip until dry. For a fully dried tear, re-relax the specimen first; forcing a dry wing will extend the tear.
- Cracked thorax: usually caused by pinning before full relaxation. There is no true repair, but you can stabilise the specimen by pinning through a small card platform beneath the thorax so the two halves stay aligned.
- Greasy or mouldy specimen: a specimen that has gone greasy (often from a fatty abdomen) can sometimes be degreased by soaking briefly in a solvent such as acetone, but this risks scale loss. Mould is harder, brush spores off with a soft dry brush outdoors, then store the specimen separately and monitor it.
- Faded wings: irreversible. The only fix is prevention, which means UV-filtering glazing and keeping the specimen out of direct light.
Preventing the mistakes in the first place
- Do not pin until the thorax and wing joints move freely. If a wing resists, the specimen needs more time in the relaxing chamber.
- Never handle dry wings with bare fingers. Use forceps, and support the wing from below.
- Keep the drying area dry and the storage case sealed.
- Freeze every new specimen before it joins the collection.
Ethical sourcing and the legal side
Many buyers ask how they can be sure specimens are ethically sourced and not taken from endangered species. The honest answer is to ask for provenance: a reputable supplier can tell you the species, origin and how it was obtained, and will not hesitate to put that in writing.
In Australia, native wildlife is protected under Commonwealth and state or territory law. The Environment Protection and Biodiversity Conservation Act sets the national framework, and each state and territory wildlife authority runs its own permit system for collecting, keeping and trading native species. Commercial trade in regulated species requires permits, and moving specimens across state borders can trigger additional requirements. A supplier who cannot answer provenance questions is a red flag, and so is anyone offering a protected species without paperwork.
For hobbyists, the practical rules are simple:
- Do not collect from national parks, reserves or private land without permission.
- Check your state or territory wildlife authority before collecting any native species.
- Keep records of where each specimen came from and any permits that apply.
- Prefer captive-bred or sustainably sourced specimens where the species is regulated.
Newman Art Designs has supplied museum-preserved specimens since 1996, with free shipping within Australia, and reviews from buyers consistently mention solid framing and careful packing. If you would rather display a finished piece than pin your own, that route skips the risk entirely, and the provenance is already documented.
Frequently Asked Questions
Can I use hairspray to preserve a butterfly?
Hairspray is not recommended for preserving butterfly specimens. It can damage the delicate scales on the wings, attract pests, and cause discoloration over time. Instead, use proper entomology pins and store the specimen in a dry, airtight display case. For long-term preservation, museum-quality mounting in a shadowbox frame or glass dome provides better protection.
What glue do you use for taxidermy butterflies?
For butterfly taxidermy, water-soluble glue like Elmer's or a specialized entomology adhesive is best. Apply a tiny amount to the thorax or abdomen to secure the specimen to the mounting surface. Avoid cyanoacrylate (super glue) as it can damage the exoskeleton and is difficult to reverse. Always use forceps to handle delicate parts.
How long do dried butterflies last?
Dried butterflies can last for decades if properly preserved and stored. Key factors include keeping them away from direct sunlight, humidity, and pests. Mounting them in an airtight display case with a desiccant like silica gel helps prevent mold. With good care, specimens can remain intact for 50 years or more.
What are the best alternatives to glass for framing butterfly specimens?
Alternatives to standard glass include acrylic (Perspex), which is lighter and shatter-resistant, and UV-filtering glass that protects against fading. For a vintage look, consider glass domes or shadowbox frames with museum-grade glazing. Ensure the material is airtight to keep out pests and humidity.
Preserving your own specimens is rewarding, but it takes weeks of drying and a steady hand, and one rushed moment undoes all of it. If you want the beauty without the bench work, Newman Art Designs offers museum-quality preserved butterflies in sealed shadowbox frames and glass domes, backed by three decades of craftsmanship and free shipping across Australia. Browse the collection and bring a piece of the natural world into your home.
