
7 Steps to Framing Large Botanical Art Pieces
Last Updated: November 1, 2026
Quick Summary
Framing large botanical art means balancing weight, flex and light exposure from the start. Measure the artwork itself, choose a rigid frame with a stiff backing board, and use acid-free mats and UV-filtering glazing. Hang the finished piece on hardware rated for its full weight.
- Measure the artwork itself at its widest and tallest points, twice.
- Choose a wide, rigid frame profile with a stiff, flat backing board.
- Hinge prints at the top edge only so they can expand and contract.
- Use 3 mm acrylic and UV-filtering glazing on pieces over 100 cm.
- Hang heavy frames on hardware rated for at least the full finished weight.
Table of Contents
- What Makes Large Botanical Art Harder to Frame
- Step 1: Measure the Artwork and Calculate Frame and Mat Size
- Step 2: Choose a Frame Profile and Depth That Can Carry the Weight
- Step 3: How to Frame Botanical Prints With a Mat That Protects the Image
- Step 4: Mount Pressed and Fragile Specimens in a Shadow Box
- Step 5: Select Glazing for Light, Humidity and Preservation
- Step 6: Hang Large Framed Artwork Securely
- Booking a Custom Framing Consultation for Your Next Piece
- Frequently Asked Questions
What Makes Large Botanical Art Harder to Frame
Large botanical art is harder to frame than a small print for one simple reason: weight, size and fragility all grow together. A pressed fern or a botanical print that measures 90 centimetres across puts far more stress on glass, wire and backing than a postcard-sized piece does. Get the basics wrong and the whole thing can sag, warp or crack.
This guide walks through seven steps to framing large botanical art pieces. Each step covers one part of the job, from measuring the artwork to hanging it safely on the wall. The advice below reflects general framing practice for large botanical pieces.
Large pieces bring a few specific challenges:
- Weight: Glass, board and a thick frame add up quickly on a big piece.
- Flex: Long, thin frame sections can bow under their own weight.
- Light exposure: More surface area means more exposure to fading.
- Handling: Oversized frames are awkward to carry, turn and hang alone.
Keep these in mind through every step. The rest of the guide shows how to plan around them.
Step 1: Measure the Artwork and Calculate Frame and Mat Size
Start by measuring the artwork itself, not the paper or board around it. Measure the height and width at the widest and tallest points, then check both measurements in two places each. Botanical pieces are often slightly uneven, so a single measurement can be off.
Next, decide how much mat border you want. A common approach is to add a border of 5 to 10 centimetres on each side for large pieces, though this depends on the look you want.
Keep the mat opening a few millimetres smaller than the artwork if you want the mat to hold the print in place. Otherwise, leave a slight gap so the print can move with the seasons without buckling.
- Measure the artwork at its largest points, twice.
- Add the mat border on all four sides.
- Note the final mat opening and the frame's inside size separately.
Watch out: Measuring the frame rebate instead of the artwork is a common error. Always confirm the frame's inside dimensions before ordering the mat.
Step 2: Choose a Frame Profile and Depth That Can Carry the Weight
Large pieces need a frame that feels solid. Choose a profile that is wide enough to stay rigid across a long span, and check that the frame depth can hold the artwork, mat, backing and glazing together without bulging.
Wood frames suit most large botanical work because they resist warping better than thin metal sections. Metal profiles can work too, but check their stiffness on long runs. Whatever you pick, look for corner joins that are tight and square.
The frame backing matters as much as the frame itself. A rigid backing board keeps the whole assembly flat and stops the mat from pulling away from the glass. For large botanical pieces, a conservation-grade board is a sensible choice.
Keep these points in mind when choosing:
- Profile width: Wider profiles resist flex on long sides.
- Depth: Enough depth to clear the mat, print and glazing.
- Joins: Square, tight corners that will not loosen over time.
- Backing: A stiff, flat board that supports the whole piece.
Step 3: How to Frame Botanical Prints With a Mat That Protects the Image
A good mat does two jobs: it spaces the print away from the glass, and it protects the image from direct contact. Use an acid-free mat board for botanical prints, since acidic board can yellow and damage paper over time.
Start by placing the print face up on a clean surface. Position the mat over it and check the spacing on all four sides. Use a small amount of hinging tape at the top edge only, so the print can still expand and contract slightly.
Pressed plants and delicate paper react to changes in humidity, so do not tape the print down on all sides. Hinge it at the top and leave the rest free.
- Use acid-free mat board and acid-free hinging tape.
- Hinge the print at the top edge only.
- Check the mat spacing before final assembly.
If you are unsure which materials are truly acid-free, check the manufacturer's specifications before buying.
Step 4: Mount Pressed and Fragile Specimens in a Shadow Box
Shadow boxes suit pressed flowers, ferns and other three-dimensional botanical specimens. The deep frame gives them room to sit without touching the glass. Before you start, lay out the specimens on a sheet of board to check the arrangement and spacing.
Fix each specimen with a small amount of clear glue or a fine pin, depending on how fragile it is. Keep fixings to the stems or the back of the material, never across the delicate surface.
Large shadow boxes are heavy once filled, so build the arrangement on the backing board rather than inside the box, then lift the whole assembly in. This saves you from repositioning fragile pieces after they are fixed.
Some helpful habits for fragile specimens:
- Keep glue use to a minimum and test it on a spare piece first.
- Support heavy stems so they do not slump over time.
- Leave a small gap between specimens so air can circulate.
Watch out: Loose specimens can shift during transport. Secure everything before you move the box, even for a short trip.
Step 5: Select Glazing for Light, Humidity and Preservation
Glazing is where large botanical pieces diverge most sharply from small ones.
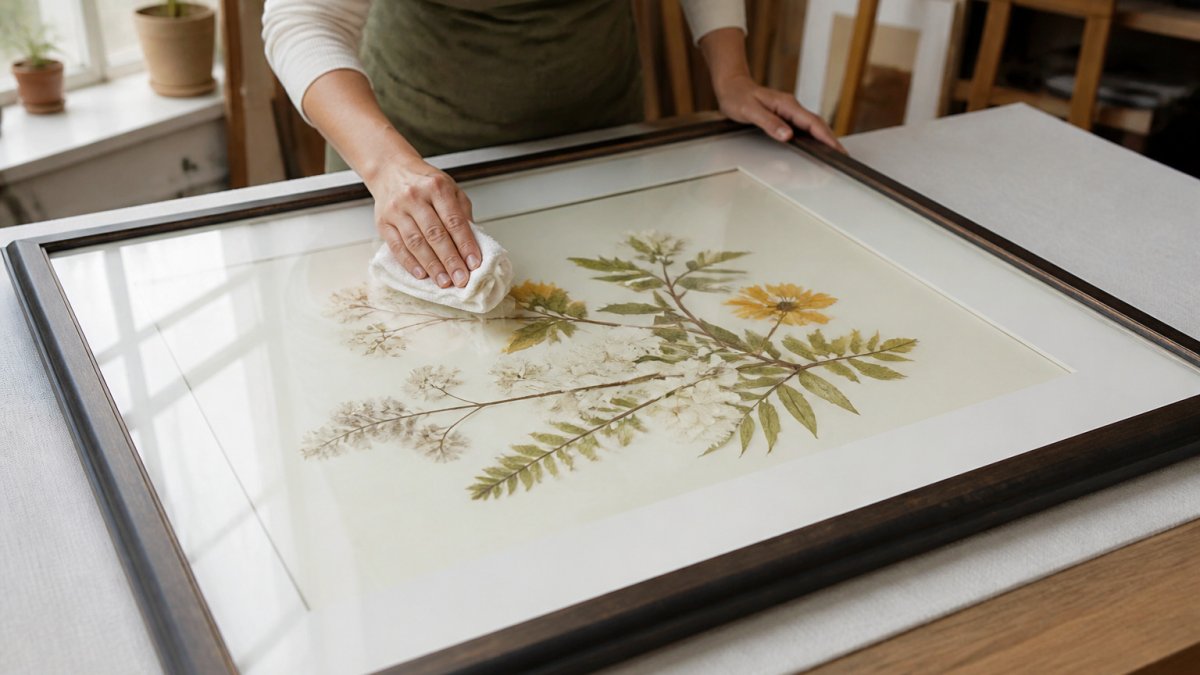
Work through the four variables below before you order glazing.
Weight and thickness. Standard picture glass is typically 2 mm; acrylic for framing is commonly supplied at 2 mm or 3 mm.
UV filtering. Ordinary glass blocks some UV but not all, and standard acrylic blocks very little. UV-filtering glazing is the sensible choice for any piece that will receive daylight.
Breakage and safety. Glass shatters into sharp fragments; acrylic cracks or crazes but stays in the frame.
Clarity and cleaning. Glass is harder to scratch and cleans with ordinary glass cleaner. Acrylic scratches easily, so use a soft cloth and a plastic-safe cleaner, and never dry-wipe dust across the surface.
A practical rule of thumb for oversized botanical work:
- Up to about 70 cm: 2 mm glass is fine if the frame is deep enough and the piece is not in a hazard zone.
- 70-100 cm: 2 mm or 3 mm acrylic, UV-filtering if the piece receives daylight.
- Over 100 cm: 3 mm acrylic, UV-filtering, with a rigid backing board and a frame rated for the combined weight.
Finally, glazing is not a sealed environment. Moisture still moves through the frame, so keep large pieces off damp walls, away from bathrooms and kitchens, and out of rooms that swing between humid and dry. Good placement does more for preservation than any single glazing upgrade.
The table below summarises the glazing options the article compares by thickness and size.
| Piece size | Recommended glazing | Note |
|---|---|---|
| Up to about 70 cm | 2 mm glass | Fine if frame is deep enough and not in a hazard zone |
| 70-100 cm | 2 mm or 3 mm acrylic | UV-filtering if the piece receives daylight |
| Over 100 cm | 3 mm acrylic | UV-filtering, with rigid backing board and suitable frame |
| Any size receiving daylight | UV-filtering glazing | Slows colour loss but does not stop it |
Step 6: Hang Large Framed Artwork Securely
Hanging is the step where large botanical pieces most often fail, because the loads are higher than people expect and the failure modes are quiet, a wire stretches, an anchor pulls, a frame twists slowly out of level.
Work out the finished weight first. Weigh the framed piece on a bathroom scale if you can lift it safely, or add up the components: frame, glazing, backing board, mat and artwork.
Match the anchor to the wall. Plasterboard alone will not hold a heavy frame; use hollow-wall anchors rated for the load, or find a stud and fix into that.
Mark and level before drilling. Hold the frame against the wall at the intended height, mark the hanging points with a pencil, then check them with a spirit level before drilling.
Lift with two people. A large framed piece is awkward rather than merely heavy, and the risk is twisting the frame or dropping it onto a corner. Clear the floor, wear gloves, and have one person take the weight at each side. Lift the frame onto the hooks rather than sliding it, and check level once it is seated.
After hanging, inspect. Check the wire or D-rings for slack after a week, then every few months. Large frames can settle as the wall and fixings adjust, and a piece that was level on day one may not stay that way. Keep the frame out of direct sun and away from heat sources, and dust the frame and glazing gently rather than spraying cleaner directly onto the surface.
Booking a Custom Framing Consultation for Your Next Piece
If you would like help choosing artwork for your space, you can explore the collection on the Newman Art Designs website. Pricing depends on the size, materials and finish you choose, so contact Newman Art Designs directly for a quote on your project.
For ready-made options, you can also browse domes to see what is available for your next piece. Once you have finished the steps above, restoring antique shadowbox frames at home is a good next project if you already own an older frame. Anyone mounting specimens should also check which materials are truly acid-free for insect mounting before buying supplies. For glazing decisions, our guide on preventing fading in shadowbox display cases explains how to protect your work from light. And if you are weighing whether a large display fits your home, is entomology decor worth it for small apartments covers the trade-offs.
Frequently Asked Questions
How do you frame large botanical art?
Start by measuring the artwork and adding a border of at least 5 to 10 centimetres for the mat, then select a frame deep enough to hold the backing, mounting board and any specimen depth. Use acid-free board and reversible mounting so the piece can be removed later. Support heavy frames with two D-rings and wire rated for the total weight, and have a professional check any piece over about 1 metre wide before hanging.
What glazing is best for protecting botanical artwork?
UV-filtering acrylic is often chosen for large pieces because it is lighter than glass. Anti-reflective glazing helps when the piece hangs near windows. Keep the glazing from touching the artwork by using spacers, so moisture and pressure do not transfer to the botanical material.
Should botanical art be mounted with a mat?
Yes, in most cases. A mat keeps the glazing from pressing on the artwork, creates a visual border, and gives a buffer for humidity changes. Use acid-free mat board and make sure the window opening is cut so it does not cover any part of the image or specimen. For irregular shapes, a custom-cut mat with a slightly larger opening is often the safest option.
How do you hang a large framed botanical piece securely?
Use two D-rings placed a quarter of the way down from the top of the frame, with wire slack enough to sit flat against the wall. Choose wall anchors rated for at least double the framed weight, and fix them into studs or masonry where possible. Test the hanging with a level and recheck after a week, as frames can shift slightly as the hanging wire settles.

