
Preventing Fading in Shadowbox Display Cases
Table of Contents
- Why Fading Happens in Shadowbox Displays
- Choosing UV-Filtering Glass for Shadowboxes
- Positioning Your Shadowbox: Where to Hang a Shadowbox
- Best Lighting for Insect Displays
- Humidity Control for Insect Specimens
- Your Step-by-Step Fading Prevention Plan
- Frequently Asked Questions
Last Updated: October 7, 2026
Why Fading Happens in Shadowbox Displays
Fading in shadowbox displays isn't random: light, particularly ultraviolet (UV) and visible light, breaks down the pigments in insect specimens over time. Butterfly wing and beetle carapace colours are either pigmentation or structural coloration, and both fade under continuous or intense light.

The culprit is cumulative light exposure: a specimen near a sunny window receives far more UV and visible light than one kept away from direct sun, and even indoor lighting contributes over years.
Temperature and humidity also matter: fluctuating conditions accelerate colour loss, while a stable, cool, moderately humid environment slows fading significantly.
The good news: preventing fading in shadowbox display cases is within your control. The right glazing, positioning, and environmental management can preserve colours for decades.
Choosing UV-Filtering Glass for Shadowboxes
Glazing is the biggest controllable variable in how much light reaches your specimen, and the most misunderstood. UV-filtering glazing is not a fade-proof shield: it removes most of the ultraviolet band but still transmits visible light, which also drives fading.
What UV-filtering glazing actually does
Standard clear glass blocks roughly 40-50% of UV on its own. UV-filtering glass blocks around 97-99% below 380 nanometres, and acrylic with a UV inhibitor performs similarly at 95-99% depending on grade.
None block visible light. A specimen behind UV-filtering glass still receives the full visible spectrum, often the dominant fading mechanism for light-sensitive pigments and dyes, which is why museums treat UV filtering as one layer of protection, not the whole answer.
Glass versus acrylic: the real trade-offs
| Material | UV block | Visible-light transmission | Weight and safety | Long-term behaviour |
|---|---|---|---|---|
| Standard clear glass | Partial, roughly 40-50% | High | Heavy, breaks into sharp shards | Stable, no yellowing |
| UV-filtering glass | Around 97-99% | Slightly reduced versus clear | Heavy, breaks into small fragments if laminated | Stable, coating can be scratched if cleaned aggressively |
| Standard acrylic | Minimal | High | Light, shatter-resistant | Can yellow and become brittle with age |
| UV-filtering acrylic | Around 95-99% | Slightly reduced | Light, shatter-resistant | UV inhibitor can migrate over decades; yellowing still possible |
Two practical points follow. Acrylic is safer for large shadowboxes, high-traffic displays, and anything shipped or moved, because it will not shatter. Glass is the better long-term optical choice for small, high-value pieces because it does not yellow or scratch as easily.
Anti-reflective and non-glare coatings
Anti-reflective coatings cancel reflections at the glass surface, making a shadowbox easier to read, and most slightly reduce light transmission, a mild preservation benefit, but viewing quality is the main reason to specify it. Non-glare (etched) glass scatters light instead, softening reflections but making fine detail look slightly hazy.
What to look for when buying
- Ask for the UV block figure in writing, expressed as a percentage below 380 nm, not just the word "UV-protective".
- Ask whether the glazing is laminated. Laminated glass holds together if it breaks and adds a further UV-absorbing interlayer.
- Confirm the glazing is not in direct contact with the specimen. A spacer or mat creates an air gap that buffers humidity swings and prevents condensation transfer.
The honest limitation
Even the best glazing will not stop a watercolour, silk textile, or fugitive red dye from shifting in bright visible light over years. UV filtering buys time and removes one damage pathway, but slowing visible-light fading means reducing how much light the object receives and for how long, a positioning and lighting problem, covered below.
Positioning Your Shadowbox: Where to Hang a Shadowbox
Where you hang a shadowbox determines its daily light exposure.
Avoid direct sunlight. Never position a shadowbox where sunlight streams onto it, direct sun delivers intense UV and visible light for hours daily.
Choose interior walls away from windows. The best position for preventing fading in shadowbox display cases is an interior wall away from all windows, such as a hallway or interior bedroom wall, where only ambient indoor light reaches the specimen.
Watch for reflected light. Light bounces off mirrors, glass surfaces, and light-coloured walls, so a shadowbox opposite a mirror receives double the exposure. Avoid this setup.
Practical positioning rules:
- Place shadowboxes on walls at least 2 metres from windows
- Avoid south and west-facing walls (receive most direct sunlight)
- Don't hang above radiators or heat sources (temperature fluctuations fade colours faster)
If your layout limits your options, use heavy curtains or UV-blocking window film to reduce light reaching the display, a practical compromise when you can't position the shadowbox far from windows.
Best Lighting for Insect Displays
Artificial lighting is safer than natural light for specimen preservation. But not all artificial light is equal.
LED lighting is ideal for insect displays: minimal heat, little UV, and longer life than incandescent bulbs.
Avoid incandescent bulbs. They produce significant heat that raises the temperature around the shadowbox and emit some UV light.
Avoid direct spotlights. A spotlight creates intense, concentrated exposure; use soft, diffused ambient lighting instead.
Museums use carefully controlled lux levels to preserve delicate specimens.
Humidity Control for Insect Specimens
Humidity affects how quickly colours fade. Too much moisture promotes mould and deterioration. Too little causes brittleness.
Morpho didius Butterfly in a Frame →
Improve air circulation. Stagnant air traps moisture around the specimen.
Use a dehumidifier in damp climates. In naturally humid homes (coastal or tropical), run a dehumidifier set to maintain 45-55% humidity.
Seal the frame. Check that the frame back is sealed and the glass sits snugly, since gaps let humid air reach the specimen.
Your Step-by-Step Fading Prevention Plan
Most guides stop at "use UV glass and keep it out of the sun". The harder part is matching the plan to what's inside, because a pressed flower, a wool uniform, a silver medal, and a colour photograph all fail differently. This plan runs from assessment to a maintenance schedule you can keep.
Step 1: Identify what you are protecting
Before you change anything, classify the contents. Sensitivity varies enormously.
- Paper and works on paper (letters, certificates, prints, clippings). Lignin in cheap paper yellows and embrittles under light and heat; newsprint browns within a few years in bright light.
- Textiles (uniforms, flags, lace, embroidery). Dyes are often fugitive, especially early synthetics, and wool and silk attract insects, so sealing matters for pest as well as moisture reasons.
- Photographs (albumen, silver gelatin, colour chromogenic). Colour prints fade faster than expected, with cyan and yellow layers going first and leaving a magenta cast.
Write the classification down. It determines every choice that follows.
Step 2: Audit the current light exposure
You cannot manage what you have not measured. Do a simple two-part audit.
Part one, natural light. Visit the display at early morning, midday, and late afternoon, and note whether direct sun ever lands on the glass.
Part two, artificial light. Count the light fittings within about two metres and note their type.
A useful conservation rule of thumb: light damage is cumulative.
Step 3: Fix the position
- Move the shadowbox to an interior wall where no direct sun ever falls.
- Keep it at least two metres from any window, further if the window faces the sun much of the day.
- Avoid walls backing onto a hot water cylinder, oven, or uninsulated exterior wall, which create temperature gradients.
If repositioning is impossible, fit close-weave curtains or UV-blocking window film on the offending window, a compromise, not a substitute for moving the frame, since it reduces but does not eliminate visible light.
Step 4: Control the environment
Aim for a stable 45-55% relative humidity and a temperature that does not swing more than a few degrees daily. Stability matters more than hitting an exact number.
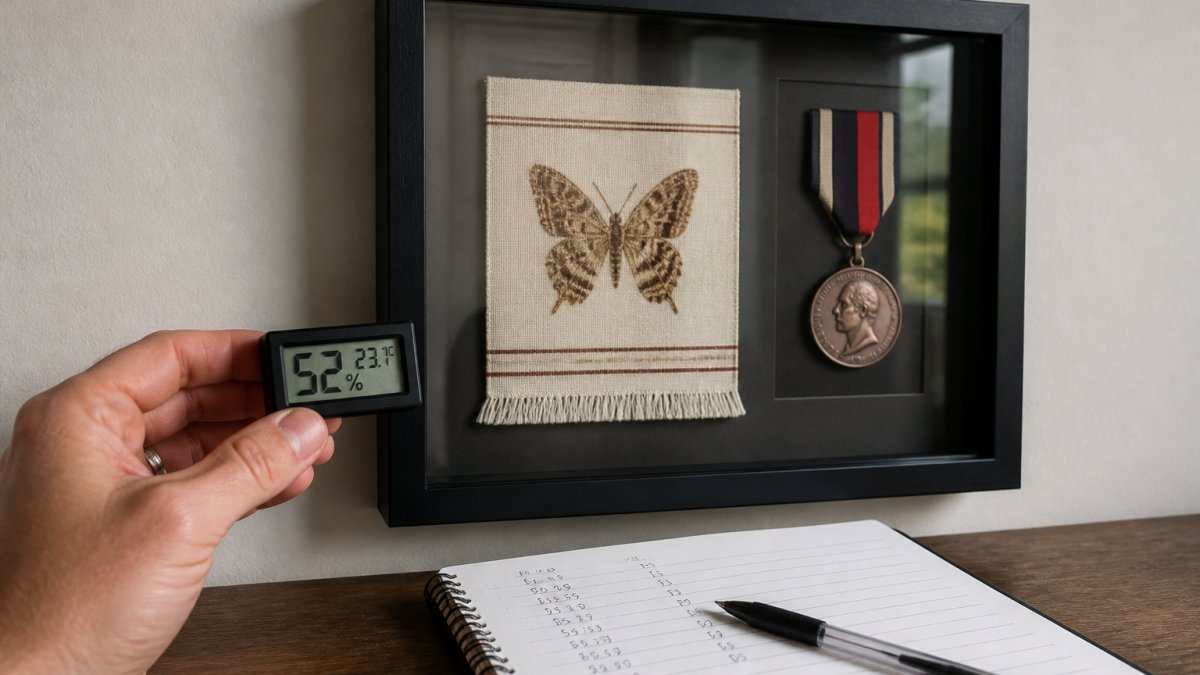
- Place a small digital hygrometer in the room, not inside the frame, and record it weekly for the first month to learn the room's pattern.
- In humid climates, run a dehumidifier set to the 45-55% band.
- In dry climates or heated winter homes, humidity can drop below 30%, embrittling paper and cracking textiles along folds; a room humidifier or a tray of water near (not touching) the display helps.
Step 5: Seal and mount correctly
- Confirm the frame back is closed and taped; an open back lets dust, insects, and humid air in.
- Mount with conservation-grade materials, ordinary tape, rubber cement, and acidic board stain and degrade the object from behind, independent of light.
- Keep the object off the glazing; a spacer or mat prevents condensation transfer and surface abrasion.
Step 6: Set a maintenance schedule
This is the part most guides skip, and where fading is actually caught early.
Monthly
- Dust the exterior glass with a dry microfibre cloth. Never spray cleaner onto the glass, spray onto the cloth, and never use ammonia-based cleaners on coated or acrylic glazing.
- Photograph the object monthly from the same angle under the same lighting; side-by-side comparison is far more sensitive than memory.
Every three months
- Record temperature and humidity.
- Check for condensation inside the glass; interior fogging means a failed seal or excessive room humidity.
- Check for insect frass (fine dust) beneath textiles and fine webbing, which signals clothes moth or carpet beetle activity.
Annually
- Re-audit light exposure at the three times of day.
- Check the frame for gaps, warping, or lifting tape.
- Reassess whether the room's use has changed, a new desk lamp, television, or window covering.
Every two to three years
- For retrofitted frames, inspect glazing for scratches and the seal for deterioration.
- For acrylic, check for yellowing by comparing the sheet edge against white paper.
- For metals, check for tarnish bloom and refresh desiccant if used.
What to do if you see fading starting
Fading is irreversible, broken-down pigments and dyes do not recover. What you can do is stop it getting worse.
- Move the object to a darker location immediately.
- Replace the glazing with a higher UV-blocking grade if it is standard glass or unprotected acrylic.
- Take a high-resolution photograph now as a record of the object's condition at the point you intervened.
Frequently Asked Questions
Does UV-filtering glass prevent fading in a shadowbox?
UV-filtering glass blocks 99% of ultraviolet radiation, which is the primary cause of fading in insect specimens and paper items. However, visible light also contributes to fading over time, so UV-filtering glass must be paired with proper placement away from direct sunlight and controlled lighting. Glass alone cannot prevent all fading without these additional measures.
How often should I check insect specimens for fading or deterioration?
Inspect your shadowbox monthly for dust accumulation and every three months for colour changes or fading. If your display is near a window or in direct sunlight, check monthly for signs of discolouration. Keep a simple log of observations so you can spot gradual changes early. Early detection allows you to adjust placement or lighting before significant damage occurs.
Can LED lights cause fading in a display case?
Standard LED lights produce minimal fading compared to incandescent or halogen bulbs because they emit less heat and ultraviolet radiation. However, prolonged exposure to any light, even LEDs, will eventually cause some fading. Use low-wattage LEDs (under 5 watts), keep them at least 30 centimetres from specimens, and limit display lighting to 8 hours per day to minimise cumulative light exposure.
What is the best way to reduce heat and humidity inside a shadowbox?
Keep your shadowbox in a room with stable temperature (18-21°C) and relative humidity between 45-55%. Avoid bathrooms, kitchens, and areas near heating vents or air conditioning units. Ensure the frame is sealed properly to prevent moisture infiltration. If your home is very humid, take steps to absorb excess moisture and protect specimens from deterioration.
