
How to Label Natural History Specimens Correctly in 7 Steps
Last Updated: November 5, 2026
Quick Summary
To label natural history specimens correctly, record locality, date, collector and a unique specimen number at the time of collection. Print or write them in a consistent layout on acid-free card using archival black ink, then pin the label beneath the specimen.
- Record locality, date and collector at the time of collection, not later.
- Use acid-free, lignin-free card with a pH of 7.5 to 9.5.
- Write with archival pigment-based black ink, not dye-based ink, which fades.
- Keep one consistent label layout across the whole collection.
- Pin the label below the insect so it does not touch legs or wings.
Table of Contents
- Why Accurate Labels Matter More Than the Specimen Itself
- What to Include on a Specimen Label
- Specimen Label Template: Layout and Field Order
- Preparing Paper, Ink and Materials for Insect Specimen Labels
- Step-by-Step: Writing and Attaching the Label
- Labelling Specimens With Missing or Incomplete Collection Data
- Common Labelling Mistakes and How to Avoid Them
- Keeping Your Labels Legible for Decades
- Frequently Asked Questions
Labelling a natural history specimen correctly is one of the most useful things you can do for it, and a clear label is what turns any collection into a lasting record. A pinned beetle with a clear, accurate label is worth far more to a researcher, a collector or a future owner than a flawless specimen with no information attached. The labels are often where the real value sits.
Most people focus on the specimen itself when they set out to label natural history specimens, treating the paperwork as secondary. They want the wings to look perfect and the colours to stay bright. The label is treated as an afterthought, a scrap of paper tucked under the pin.
Why Accurate Labels Matter More Than the Specimen Itself
A label is a record. It tells anyone who looks at the specimen where it came from, when it was collected and who collected it. Without that record, even a rare and beautiful insect is hard to use for research.
Here is a quick way to think about it:
- The specimen shows what the organism looks like.
- The label shows where, when and how it was found.
- Together they make the specimen useful for science and for display.
A common mistake is to write a label quickly and assume you will remember the details. You will not. Write the data at the time of collection, or as soon after as you can.
What to Include on a Specimen Label
A good specimen label usually contains a small set of core fields. Keep them consistent across your collection so anyone can read them at a glance.
- Locality: the place where the specimen was collected, as specific as you can make it.
- Date: the day, month and year of collection.
- Collector: the name of the person who collected the specimen.
- Species name: the scientific name if known, or a clear working name if not.
- Specimen number: a unique identifier that links the label to your own records.
Some collections add extras such as habitat notes, host plant or coordinates. These are useful but optional for most home collectors.
Specimen Label Template: Layout and Field Order
Using the same layout on every label saves time and reduces errors. Field order matters because it lets readers scan labels quickly.
Here is a simple template you can copy:
Line 1: Locality (for example, "Mount Lofty Ranges, SA") Line 2: Date (for example, "14.iii.2024") Line 3: Collector (for example, "J. Newman") Line 4: Specimen number (for example, "NAD-0142") Line 5: Species name (for example, Polyura cognatus)
Many collectors place the species name last or on a separate, slightly larger label. Choose one system and stick with it. For a deeper look at how display choices affect what you see, see our guide on how to start a natural history collection.
Preparing Paper, Ink and Materials for Insect Specimen Labels
The materials you choose decide whether a label survives. Paper that is too acidic will yellow and become brittle. Ink that is not archival will fade or run.
Gather these items before you start:
- Acid-free card or paper. Look for paper described as acid-free, lignin-free and buffered, typically with a pH of 7.5 to 9.5. A card weight of around 160 to 220 gsm holds its shape on a pin without curling; lighter paper (80 to 120 gsm) is easier to cut but flops and creases. Avoid recycled office card, which often carries lignin and residual acidity.
- Archival black ink. Pigment-based ink sits on the surface and resists fading far better than dye-based ink, which sinks into the fibres and bleaches with light exposure. Indian ink is the traditional choice and is widely available in pigment form; check the bottle states it is pigment-based and water-resistant.
- A fine-tipped pen or a printer that uses archival ink. For handwritten labels, a 0.1 to 0.3 mm pigment liner gives crisp lettering at label size. For printed labels, confirm the printer uses pigment ink rather than dye ink, and test a sample before committing a batch.
- Fine tweezers. Size 3 or 4 watchmaker-style tweezers with fine, slightly curved tips let you handle a 10 mm label without creasing it. Straight blunt tweezers are too coarse for label work.
- Pins of the correct size. Label pins are usually finer than specimen pins. Insect pins are graded by number: a size 2 or 3 pin suits most medium beetles and moths, while size 0 or 00 is needed for very small specimens. Match the label pin to the specimen pin so the label does not swing or abrade the specimen.
- A cutting mat and a sharp blade or fine scissors. A steel ruler and a scalpel or craft knife give square corners; blunt scissors crush the card edge and leave a ragged margin that frays over time.
Test your ink on a scrap of card first. If you also have an old shadowbox or frame holding specimens, restoring antique shadowbox frames at home explains how to prepare it before relabelling.
A common pattern is to buy one good batch of card and ink and use it across the entire collection.
The article's material guidance can be summarised as follows.
| Material | Recommended choice | Avoid |
|---|---|---|
| Paper | Acid-free, lignin-free, buffered card | Recycled office card |
| Paper weight | Around 160-220 gsm | Lighter 80-120 gsm paper that creases |
| Paper pH | 7.5 to 9.5 | Acidic paper |
| Ink | Archival pigment-based black ink | Standard dye-based ink |
| Pen tip | 0.1 to 0.3 mm pigment liner | Coarse tips |
| Tweezers | Size 3 or 4 fine watchmaker tweezers | Straight blunt tweezers |
Step-by-Step: Writing and Attaching the Label
Follow these seven steps for every specimen. The process becomes quicker with practice.
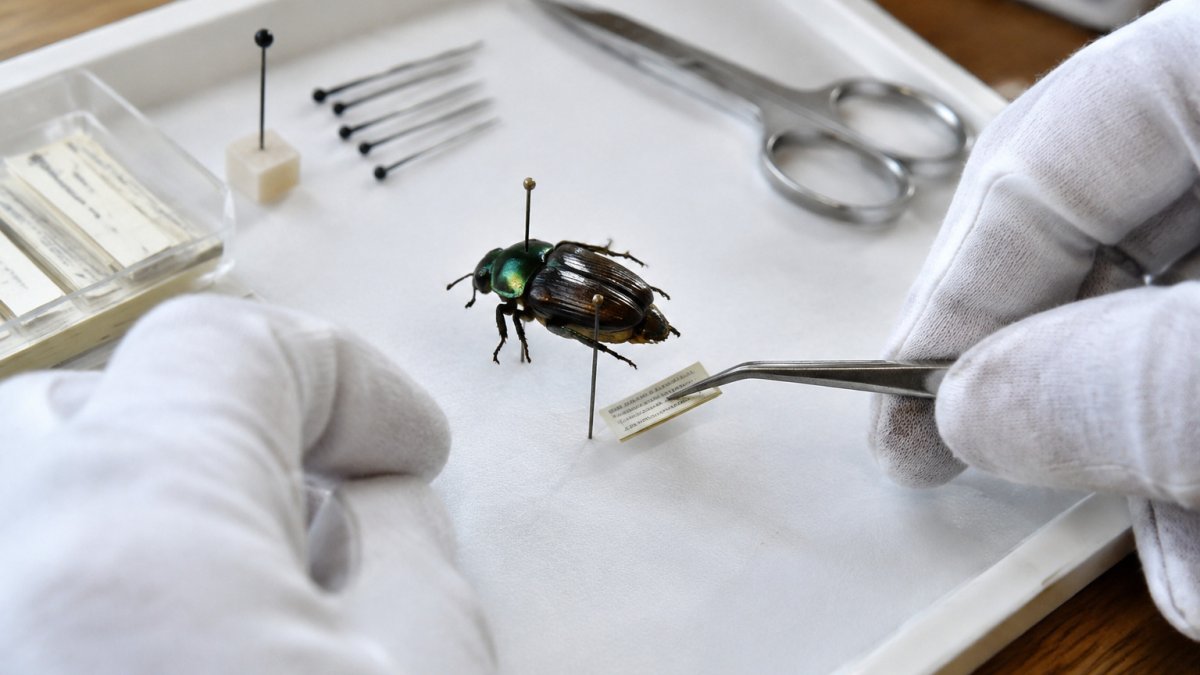
- Record the data first. Note locality, date and collector in a notebook before you write the label.
- Cut the label. Trim your acid-free card to a small, neat rectangle, usually about 10 to 15 mm wide.
- Write or print the label. Use archival ink and follow your template order exactly.
- Check for errors. Read the label against your notebook. Fix mistakes now, not later.
- Pin the label. Slide the label onto the pin first, then push the specimen pin through it, so the label sits below the insect.
- Position the label. Keep it level and close enough to read without the label touching the specimen.
- Store and record. Enter the specimen number into your catalogue so the label and your records match.
Handle pins and labels with tweezers wherever possible. Oils from your fingers can mark card over time.
Where to Place the Label on a Pinned Insect
Placement affects both readability and the look of the display. Most collectors pin the label at the bottom of the pin, directly below the insect, so it sits under the body without covering the wings.
Keep the label far enough from the specimen that it does not rub against legs or antennae. A small gap of a few millimetres is enough. If the insect is very small, use a shorter pin and adjust the label height so it still reads clearly.
Labelling Specimens With Missing or Incomplete Collection Data
Sometimes you inherit a specimen with no details, or you cannot remember where you collected it. This happens to almost every collector eventually. The worst response is to guess and write the guess as fact.
Instead, be honest on the label:
- Write "locality unknown" rather than inventing a place.
- Use a question mark if you are unsure of a detail, and record your reason in your catalogue.
- Keep the specimen number even when other fields are blank, so it can still be tracked.
An honest blank is far more valuable than a confident mistake. Researchers can work with unknown data. They cannot work with false data.
If you need to move or send a delicate specimen with its label, pack it securely and check that the label stays attached. Our guide on how to ship delicate specimens safely covers this in more detail.
Common Labelling Mistakes and How to Avoid Them
Most label problems come from a handful of habits. Watch for these:
- Writing from memory later. Record details at the time of collection.
- Using standard ink. Standard ink fades; archival ink lasts.
- Mixing label layouts. Inconsistent order makes labels hard to read.
- Skipping the catalogue. A label with no matching record cannot be checked.
- Pinning labels too close. Labels that touch legs or wings cause damage over time.
- Using acidic paper. Acidic card yellows and crumbles.
A common pattern is to label the first ten specimens carefully, then slip into shortcuts. Keep your standards the same from the first specimen to the last.
Keeping Your Labels Legible for Decades
Labels are only useful if they remain readable.
Light. Ultraviolet and visible light both fade ink and damage insect pigments. Keep specimens out of direct sun and away from display lighting that runs hot or emits strong UV.
Humidity and temperature. Sharp swings do more damage than a steady, slightly imperfect environment.
Storage materials. Use acid-free storage boxes and avoid PVC sleeves, which off-gas and can stick to card over time.
Handling. Oils from fingers mark card and attract dust, so handle labels with tweezers.
Inspection and replacement. Check your labels every few years, and more often if the collection sits in a variable space.
A common pattern is to treat storage as a one-off setup and then never revisit it. For a closer look at whether preserved specimens and their ink fade over time, see do preserved insect specimens fade.
Frequently Asked Questions
What information should a natural history specimen label include?
At minimum, a specimen label should record the locality (the place of collection, as specific as possible), the date collected, the collector's name, and the identification or determination of the species. Many collections also add the habitat, altitude or GPS coordinates, and a unique catalogue number that links the label to field notes or a database entry. The locality and date are the two fields that carry the most scientific value, because they allow the specimen to be used for distribution and seasonal studies decades later. If a detail is unknown, leave it out rather than guessing, and say so in your records.
How do you label an insect specimen?
Print or write the label on acid-free paper using waterproof, archival ink, keep the text small and sharp, and place the label on the pin beneath the insect so it can be read without lifting the specimen. Write the locality first, then the date, then the collector, and finish with the determination if known. Once the label is attached, check that it sits level and does not touch the insect's legs or wings. Insect specimen labels are usually small, so a consistent layout across your collection makes them far easier to read and audit.
What is the correct format for a specimen label?
A common format sets out the locality on the first line, followed by the altitude or habitat, then the date and the collector's name, with the determination and catalogue number at the bottom. Keep the same order on every label so that anyone reading your collection can find the information quickly. Use a specimen label template, either printed on a sheet of acid-free card or set up in a spreadsheet and printed in batches, so every label is consistent. Abbreviate only where the meaning stays clear, and always write dates in day, month, year order to avoid confusion.
Can you label a specimen if its collection details are unknown?
Yes, but the label should say only what you know. If the locality is unknown, write 'locality unknown' rather than leaving the field blank, because a blank can look like an oversight. You can still label the determination and any catalogue number, which keeps the specimen useful for identification. Record the gap in your own register so that future owners understand why the detail is missing. An honest label with known information is worth more than a confident label that contains guesses.

