
How to Organise a Private Specimen Database Step by Step
Quick Summary
A specimen database is organised by defining its scope, choosing a tool such as a spreadsheet, collection software or custom database, and building a consistent schema of fields. Give each specimen a permanent ID, link every record to a labelled photo, and keep at least two backups.
- Write a scope statement first, covering whether the collection is for display, study or resale.
- Use a spreadsheet for under about 200 specimens with simple records.
- Store acquisition dates in ISO format (YYYY-MM-DD) so you can sort and filter them.
- Use controlled lists for group, preservation method and condition to prevent typos.
- Keep at least two backups in different places, and back up after each batch of entries.
Table of Contents
- Why a Private Specimen Database Is Worth Setting Up
- Step 1: Define the Scope and Purpose of Your Collection
- Step 2: Choose Between a Spreadsheet, Collection Software or Custom Database
- Step 3: Build a Specimen Database Template and Schema
- Step 4: Assign Unique Identifiers and Set Up a Specimen Labelling System
- Step 5: Record Collection Details and Link Records to Physical Specimens
- Keeping Your Records Secure, Backed Up and Accurate
- Start Your Database Today With a Single Specimen
- Frequently Asked Questions
Why a Private Specimen Database Is Worth Setting Up
Last Updated: November 6, 2026
A private specimen database turns a growing pile of insects, spiders and skeletons into a collection you can actually manage. Without one, you lose track of where each piece came from, when you acquired it and how it is preserved. Collectors who keep solid records are the ones who can answer questions about their pieces years later. This guide walks through the process one step at a time.
Many collectors start with a shelf of framed pieces and a memory of where they bought them. That works for a handful of items. Once you pass about twenty specimens, the memory fails. A simple database fixes that, and it costs very little time to set up.
The payoff goes beyond tidiness. A good record tells you what you own, supports insurance claims, helps you trace provenance and makes it easier to rotate or re-frame displays. It also helps you buy with intent, because you can see gaps in your collection before you spend money.
Most collectors who skip this step later spend hours reconstructing details they could have logged in minutes. Set it up early, even if the collection is small.
Step 1: Define the Scope and Purpose of Your Collection
Before you pick a tool, decide what the database is for. A display collection, a study collection and a gift collection each need different fields. Write down two or three sentences describing your goal.
Ask yourself these questions:
- Is the collection for display, study or resale?
- Which groups will it include, such as butterflies, beetles, spiders or reptile skeletons?
- How many specimens do you expect to hold in five years?
A clear scope stops you from adding fields you will never use. It also tells you how detailed each record needs to be. A display-only collection can stay simple, while a study collection needs more detail on origin and identification.
Keep the scope statement at the top of your database file so future you remembers the purpose.
Step 2: Choose Between a Spreadsheet, Collection Software or Custom Database
Most collectors do not need to choose a tool in the abstract. They need to choose against four practical constraints: how many specimens they will hold in five years, whether they need offline access in the field or at a display case, how comfortable they are maintaining software, and whether the records contain sensitive locality data.
Spreadsheets. A spreadsheet is the right default for a private collection under roughly 200 specimens with simple records. It is free, works offline, exports to CSV, and is easy to back up. The limits appear quickly: photo handling is clumsy, there is no built-in audit trail, and a single accidental sort or paste can corrupt rows.
Collection software. Purpose-built collection software adds photo fields, label printing, controlled vocabularies, and sometimes loan and location tracking. It suits a growing collection that needs consistent labels and photographs, or a collector who wants to hand a clean export to an insurer or a future owner.
Custom database. A custom database, whether built in a low-code platform or with a scripting language, offers the most control over fields, validation, and access permissions. It is justified when you need multi-user access with different permission levels, automated backups, or a schema that changes often. It is rarely justified for a collection of forty framed pieces.
A practical decision path:
- Under about 200 specimens, one user, simple records: spreadsheet.
- Growing collection needing labels, photos, and consistent fields: collection software with a confirmed export path.
- Multiple users, sensitive locality data, or a schema that changes often: custom database with documented backups.
Watch out: the most common mistake is choosing a tool by brand or by a single feature rather than by whether you can export your data cleanly and restore it after loss. Test the export before you enter more than a handful of records.
Whichever option you choose, keep the scope statement from Step 1 at the top of the file or project so the tool serves the collection rather than the other way around.
The article compares three tool options against the collection's size and needs, summarised below.
| Option | Best for | Key limit |
|---|---|---|
| Spreadsheet | Under about 200 specimens, simple records | No audit trail; photos handled clumsily |
| Collection software | Growing collection needing labels and photos | Learning curve; check export formats |
| Custom database | Multiple users, sensitive locality data | Needs ongoing maintenance |
Step 3: Build a Specimen Database Template and Schema
A schema is the list of fields each record holds, together with the data type and the allowed values for each field. A specimen database template gives every record the same structure, which is what makes sorting, searching, and later export reliable. Build the schema once, test it on a few real specimens, then enter the rest.
Use these core fields as a starting point, with the data type and convention shown:
- Specimen ID (text, unique, never reused): a prefix plus a zero-padded sequence, such as NAD-0001.
- Common name (text) and scientific name (text, genus and species in italics where the tool allows).
- Group (controlled list): butterfly, beetle, spider, scorpion, skeleton, other.
- Acquisition date (date, ISO format YYYY-MM-DD): store as a true date, not free text, so you can sort and filter.
- Acquisition source (text): seller, gift, field collection, or exchange.
- Price paid (decimal, in AUD): leave blank rather than entering zero when unknown.
- Preservation method (controlled list): shadowbox frame, glass dome, pinned box, other.
- Display location (text): room and wall or shelf code.
- Condition (controlled list): good, fair, damaged, repaired.
- Photo file name (text): the file name only, with the photos stored in a folder named by specimen ID.
- Sensitive locality flag (yes/no): mark records where precise location should be restricted.
- Notes (long text): free text for provenance and repairs.
Set up data validation wherever the tool allows it. Limit the Group, Preservation method, and Condition fields to fixed lists so you cannot type 'Buttrfly' by mistake. Use ISO dates throughout, and record all prices in AUD with the currency stated in the field name so a future reader does not have to guess.
A single example record makes the schema concrete:
- Specimen ID: NAD-0007
- Common name: Monarch butterfly
- Scientific name: Danaus plexippus
- Group: butterfly
- Acquisition date: 2025-03-14
- Acquisition source: gift from a local collector
- Price paid: (blank)
- Preservation method: shadowbox frame
- Display location: study, north wall
- Condition: good
- Photo file name: NAD-0007-front.jpg
- Sensitive locality flag: no
- Notes: small chip on lower right of frame, repaired 2025-04.
Two schema decisions matter more than the rest. First, keep the ID field separate from any label or display text so you can re-label without changing the record. Second, decide early whether you will ever share or export records; if so, use consistent field names and controlled vocabularies now, because retrofitting them across hundreds of records is slow and error-prone. A common pattern is to keep a short data dictionary at the top of the file listing each field, its type, and its allowed values.
Test the template with three or four real specimens before you enter the rest. Adjust fields that feel awkward, then freeze the schema and note the version and date at the top of the file so you can track changes later.
Step 4: Assign Unique Identifiers and Set Up a Specimen Labelling System
Every specimen needs one identifier that never changes, even if you move or re-frame it. A catalogue number, accession number or simple sequential code all work. The key is consistency.
- Assign IDs in the order you acquire specimens.
- Use a prefix for the group if you like, such as BF for butterflies.
- Never reuse an ID, even after you dispose of a specimen.
Place a small label on the back of each frame or the base of each dome. Print the ID clearly and keep the label flat and sealed. Some collectors use acid-free labels to protect the specimen and the backing board.
Write the same ID in the database and on the label. Matching them lets you find any piece in seconds.
Step 5: Record Collection Details and Link Records to Physical Specimens
This step connects each digital record to the real object. Enter the details while you still have the paperwork or receipt in hand.
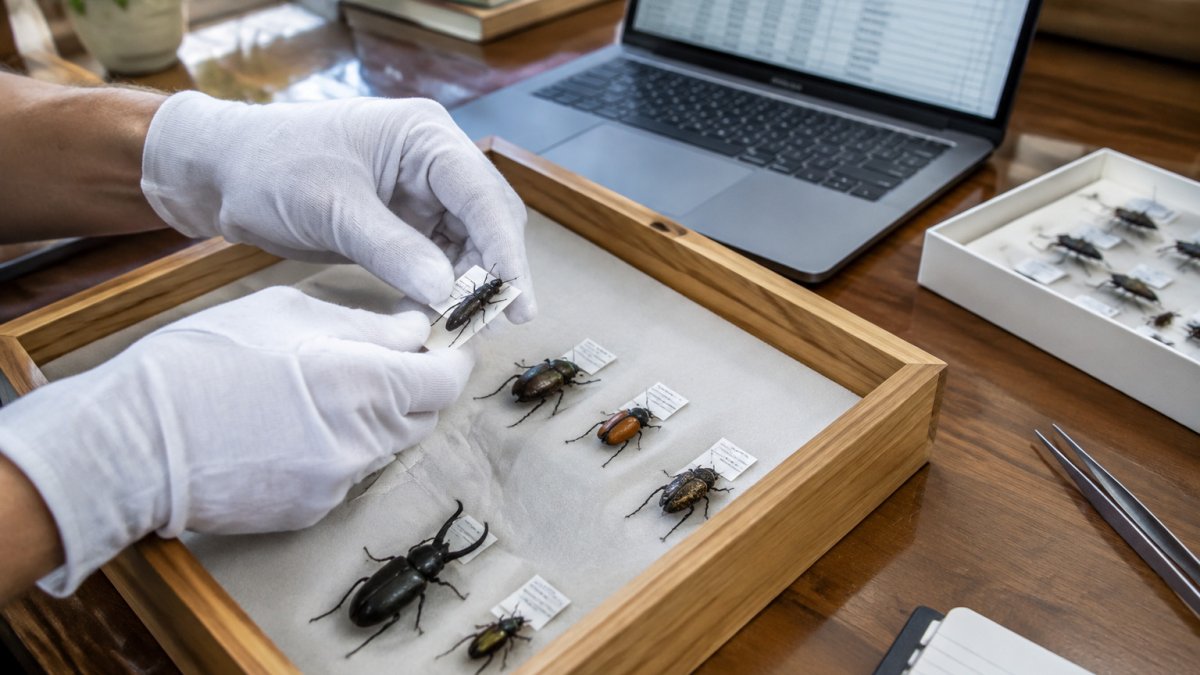
Record the following for every specimen:
- Date and place of acquisition
- Seller or source name
- Price paid, in AUD
- Photo of the front and back
- Any certificates of authenticity
A practical tip: take one photo of each specimen with its ID label visible. Store the photo in a folder named by ID. This gives you a visual link between the record and the object.
Next, check the link every few months. Pick five specimens at random, find each record and confirm the label matches. Catching a mismatch early saves a lot of confusion later.
Keeping Your Records Secure, Backed Up and Accurate
Your database is only useful if it survives. Keep at least two copies in different places, such as a cloud drive and an external hard drive. Back up after each batch of new entries, not just once a year.
Store the file somewhere access is restricted, especially if it holds personal details of sellers or buyers. Use a strong password on the file or account.
Accuracy needs regular attention too. Set a monthly reminder to review new entries, fix typos and update condition notes. Note the date of each review at the top of the file.
Watch out: the most common data loss happens when a single file lives only on an old laptop. One backup in a second location removes that risk.
Start Your Database Today With a Single Specimen
You do not need to finish the whole collection in one sitting. Pick one specimen, write its scope note, create its record, print its label and take its photo. That single entry is your template for everything that follows.
Once the first record is complete, add the next one the same way. Within a few weeks, your specimen database will hold your full collection. Keep every record in step with its label as you grow.
Frequently Asked Questions
How do you organise a specimen collection?
Start by defining what the collection is for, then group specimens by taxonomic order or by collection site, depending on what you most need to find. Give each specimen a unique identifier, store it in a labelled container, and record its details in one central database. Review the structure every few months so the system keeps pace with your collection's growth. Keeping the scope written down makes later decisions about which specimens to add much easier.
What information should a specimen database include?
At minimum, record the specimen's unique ID, taxonomic identification, collection date, collection location, collector and storage location. Add provenance, condition notes and any preservation details that affect how the specimen is handled later. Photographs and documents such as purchase receipts or field notes can be linked to the same record. Consistent data entry matters more than the number of fields, so keep the list manageable.
How do you assign unique identification numbers to specimens?
Use a simple, consistent format such as a year-based prefix followed by a sequential number, for example 2026-0001. Assign the number at the moment a specimen enters the collection, and never reuse a number even if a specimen is later removed. Write the same ID on the physical label and in the database record. This shared identifier is what links the physical specimen to its digital entry.
How often should you back up a specimen database?
Back up after every significant batch of entries and at least once a month for an active collection. Keep one copy on a separate device or in cloud storage, and test that you can restore from it. A spreadsheet or database file that is only saved on one computer is at real risk of loss, so automated backups are worth the small effort to set up.

