
What Is the Best Lighting for Insect Shadowbox Art?
Quick Summary
The best lighting for insect shadowbox art is usually a cool-to-neutral LED strip set above the frame, dimmed to modest levels and kept away from direct sunlight. This combination reveals colour and structure while limiting fading and glare on the glass.
- Choose an LED source around 5500 K for a neutral-to-cool look close to daylight.
- Look for a colour rendering index of 90 or higher so true colours show accurately.
- Place the light above the frame, angled downward, to avoid glare on the glass.
- Start with a dimmer set low, and keep illuminance in the low hundreds of lux for delicate specimens.
- Keep displays out of direct sunlight, since strong UV fades pigments quickly.
Table of Contents
- Why Lighting Matters for Preserved Insect Art
- Natural Light Versus Artificial Light for Shadowboxes
- LED Lighting for Shadow Boxes: Colour Temperature, CRI and Lux
- How to Light a Shadow Box Without Damaging the Specimen
- Glare-Free Lighting for Framed Art Behind Glass and Acrylic
- Lighting by Specimen Type: Butterflies, Beetles and Moths
- Placing Your Lights and Monitoring Your Display Over Time
- Choosing the Right Lighting Setup for Your Shadowbox
- Frequently Asked Questions
Last Updated: November 8, 2026
Lighting can make or break a preserved insect display. The right light brings out the iridescent blues of a butterfly wing or the metallic sheen of a stag beetle, while the wrong light fades colours, creates glare on the glass and slowly damages the specimen. If you own or are planning an insect shadowbox, the best lighting for insect shadowbox art is usually a cool-to-neutral LED strip set above the frame, dimmed to modest levels and kept away from direct sunlight.
Why Lighting Matters for Preserved Insect Art
Light is the one factor you control every day after a piece is hung. Every hour of strong light adds a small amount of wear to pigments over time.
Good lighting does two jobs at once. It reveals structure and colour, and it protects what it reveals. Poor lighting can wash out fine detail, create reflections on glazing, or gradually bleach the wings.
- Light reveals the texture of wing scales and the sheen of beetle shells, and our guide to best lighting techniques for luxury nature wall displays walks through the options.
- Light fades pigment over time, especially blues and reds
- Glare on glass hides the specimen from the viewer
Natural Light Versus Artificial Light for Shadowboxes
Natural daylight looks beautiful, but it is the hardest light to control. Direct sun carries strong ultraviolet (UV) radiation, which breaks down pigments quickly.
Artificial light gives you consistency. You can control brightness, direction and colour temperature, and you can switch it off when the room is empty.
A common approach is to keep the display in bright indirect light from a room, then add a dedicated LED source for detail.
LED Lighting for Shadow Boxes: Colour Temperature, CRI and Lux
LED lighting is the most practical choice for shadow boxes. It runs cool, uses little power and emits very little UV. When you shop for LED lights, three specifications matter most: colour temperature, colour rendering index and illuminance.
Colour temperature describes how warm or cool the light looks. Colour rendering index describes how accurately the light shows true colours. Illuminance describes how much light reaches the specimen.
Choosing a Colour Temperature Around 5500 K
Many collectors choose a neutral-to-cool light around 5500 K. This sits close to daylight and shows blues, greens and browns without a strong yellow or orange cast. It helps iridescent wings look their natural best.
Warmer light, around 2700 K to 3000 K, can make specimens look golden and soft, which suits some display settings. Test both in your room before committing, because wall colour changes the result.
Why Colour Rendering Index Matters
Look for a colour rendering index (CRI) of 90 or higher. A high CRI means the light shows colours accurately, so a blue wing looks blue rather than grey.
Check the packaging or product sheet for the CRI figure before buying. Many budget strips list only the colour temperature.
The article's key lighting specifications and their recommended values are summarised below.
| Specification | Recommended value | Note |
|---|---|---|
| Colour temperature | Around 5500 K | Neutral-to-cool, close to daylight |
| Warm alternative | 2700 K to 3000 K | Golden, soft look; test against wall colour |
| Colour rendering index | 90 or higher | Shows true colours accurately |
| Illuminance | Low hundreds of lux | Sensible starting point for delicate specimens |
| Lighting type | LED | Runs cool, low power, minimal UV |
| Light placement | Above the frame, angled down | Keeps source out of viewer's line of sight |
How to Light a Shadow Box Without Damaging the Specimen
The goal is enough light to see the specimen clearly, with as little energy and UV as possible. Position the light above the frame, aimed downward at a shallow angle. This lights the specimen evenly and keeps the source out of the viewer's line of sight.
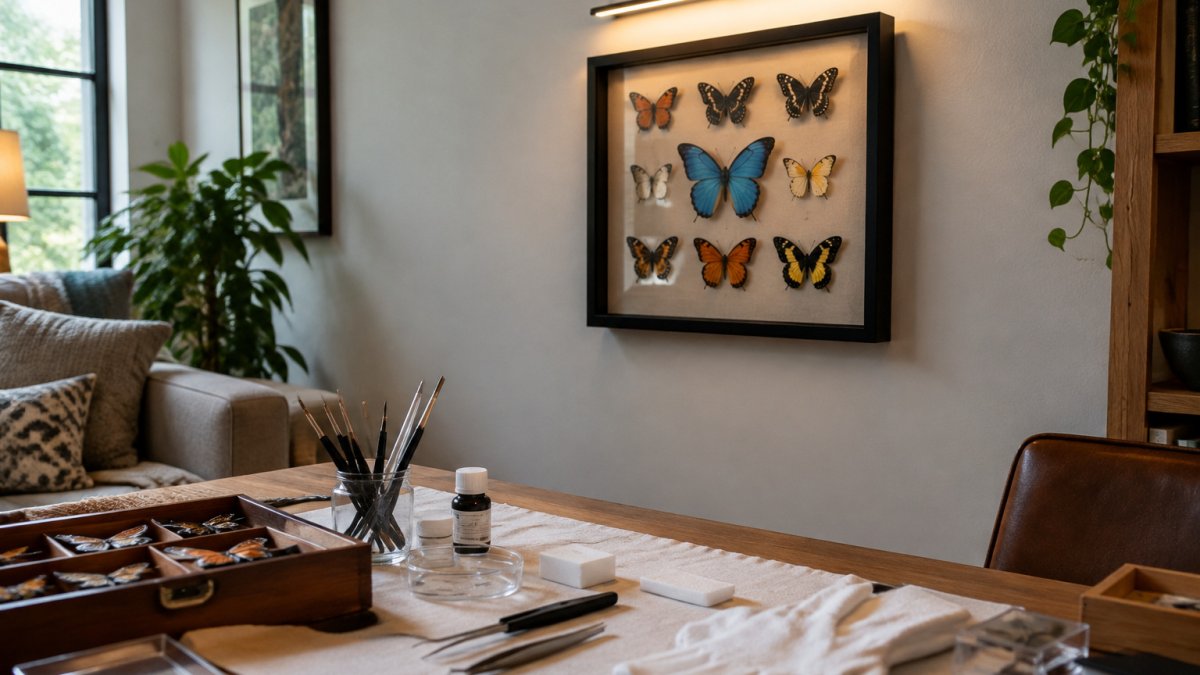
Use a dimmer where possible. Start low and raise the brightness until you can see detail comfortably, then stop. Brighter is not better for preserved material.
Setting Illuminance and Keeping UV Exposure Low
Illuminance is measured in lux. For display conditions, many conservation guidelines suggest keeping light levels modest for sensitive organic material.
Keep UV exposure low by choosing LED sources with minimal UV output and by using UV-filtering glazing where available. Cumulative exposure matters as much as brightness, so a display lit for many hours a day deserves more care than one lit occasionally.
Avoiding Direct Sunlight and Fading
Direct sunlight is the fastest route to fading. Keep shadow boxes out of direct sun, including sun through a window at certain times of day. If a window is unavoidable, use sheer blinds or hang the display on a wall that does not face the sun for long periods.
Rotating a display is a simple precaution. If you have several pieces, move them on a schedule so that no single specimen is always the one nearest the light.
Glare-Free Lighting for Framed Art Behind Glass and Acrylic
Glass and acrylic protect the specimen, but they reflect light. A poorly placed lamp can turn your display into a mirror.
Place the light above and slightly in front of the frame, and angle it downward. Compare how each mounting handles light in resin vs glass dome taxidermy display differences.
Acrylic scratches more easily than glass and can carry a static charge that attracts dust.
Lighting by Specimen Type: Butterflies, Beetles and Moths
Most guides stop at the insect. In a real shadowbox the light falls on several materials at once, the specimen, the pin, the label, the backing board and the glazing, and each responds differently. Tailor the setup to the whole assembly, not just the wings.
Butterflies and moths
Iridescent blues and greens are structural colours and can look dull under low-CRI light, but the pigments underneath are among the most light-sensitive in any collection. Use a cool, high-CRI source (around 5500 K, CRI 90+) at the lower end of your lux range, and avoid strong side lighting that exaggerates scale texture at the expense of pattern.
Beetles and metallic species
Glossy elytra and metallic shells produce specular highlights that can blow out detail. A slightly warmer, softer source (around 3000-4000 K) with diffusion reduces harsh hotspots and reveals body shape. Keep the light above and slightly forward so the highlight sits on the curve of the shell rather than flat on the glazing.
Dragonflies and damselflies
Transparent and iridescent wings catch light from above well, but the long abdomen and fine venation need even coverage. A single neutral LED bar positioned to cover the full length avoids the dark band you get when a short source only lights the thorax.
Pinned specimens and mounting materials
Pins are usually stainless steel or brass; both are stable under LED light, but brass can tarnish over years and is better kept away from humid, warm spots near a lamp. Foam and card mounting bases can yellow under prolonged UV, so the same UV-limiting steps that protect the specimen also protect the mount. Avoid mounting specimens on acidic paper or board, which darkens with light and heat exposure.
Labels and data slips
Paper labels are often more light-sensitive than the specimen and fade faster than people expect. If a label is part of the display, keep it out of the brightest part of the beam, or use a printed archival label and accept that it will still shift over years. Where the label is hidden on the reverse, lighting choice barely matters, but do not assume that means the whole piece is low-risk.
Backing boards and fabrics
Dark backing boards hide dust and make metallic specimens pop, but they also absorb light and can make the display look dim, tempting you to over-light. Pale or fabric backings reflect light back onto the specimen and can wash out pale wings. Match the backing to the specimen first, then set lux to suit the combination rather than the insect alone.
A quick decision path
- Iridescent or blue/green wings: cool, high-CRI, low lux, diffuse.
- Metallic or dark beetles: slightly warmer, diffused, watch for hotspots.
- Pale moths or transparent wings: broad, even, neutral light.
- Prominent paper label: keep it out of the brightest zone.
- Dark backing: resist the urge to over-light; raise CRI before raising lux.
Placing Your Lights and Monitoring Your Display Over Time
Placement is the final step. Mount the light so it covers the whole specimen evenly, with no hot spots. Keep it at a distance that gives even coverage without overheating the frame.
Check the display every few months. Look for colour shifts, dust on the glazing, and any warmth near the light source.
Plan where the display sits in the room too. A wall with soft, consistent light and no direct sun is ideal.
Choosing the Right Lighting Setup for Your Shadowbox
For most people, the best setup is simple: a neutral LED strip with a CRI of 90 or more, mounted above the frame, angled to avoid glare, and dimmed to a comfortable level.
Start with the specimen, not the light. A butterfly with pale blue wings needs a different approach from a dark stag beetle.
If you are choosing a piece to light, browse our Swirl of Butterfly Delight, which is set in a black shadow box with three butterflies in a swirling pattern, priced at $154.95 AUD. Its bright blues and soft pinks reward careful lighting. Our Triple Stag Beetles in a Frame, at $119.95 AUD, is a good choice for showing metallic detail under a softer light.
Shop Newman Art Designs to find a framed specimen that suits your space, then light it with care so it lasts for years.
Frequently Asked Questions
What is the best type of light for an insect shadowbox?
For most insect shadowboxes, a daylight-balanced LED around 5500 K with a colour rendering index of 90 or higher gives the most accurate colours without the heat of halogen bulbs. Bright indirect light is ideal, and LEDs emit very little UV, which helps reduce colour fading. Avoid direct sunlight entirely, since even filtered daylight through a window can fade bright blues and pinks over time. A soft, diffused LED placed above or to the side of the frame will show the wing detail clearly while keeping the specimen safe for many years.
How do you light a shadowbox without creating glare on the glass?
Glare comes from light hitting the glass or acrylic at an angle that reflects back toward your eye. Mount the light above the frame and angle it downward at roughly 30 to 45 degrees, so the reflection bounces toward the floor rather than your face. Use a diffused or frosted LED strip instead of a single bright spot, and consider an anti-reflective glazing if the display sits in a bright room. Testing the angle at different viewing positions before fixing the light in place saves frustration later.
Can direct sunlight damage insect shadowbox art?
Yes. Direct sunlight, and to a lesser extent strong daylight, carries ultraviolet light that breaks down the pigments in butterfly wings, beetle shells and other specimens. The damage is cumulative, so a frame that looks fine for a year can show visible fading after several years of exposure. Position the display away from windows, or use UV-filtering glazing if a sunny wall is unavoidable. Rotating the display occasionally in a dim room is another simple way to limit uneven light exposure.
How bright should lighting be for a shadowbox display?
A comfortable level for viewing is usually in the range of 50 to 150 lux at the frame, which is roughly the brightness of a well-lit living room. Brighter light is not better, because higher illuminance increases heat and long-term light damage without improving detail. A dimmable LED lets you adjust the level to suit the room and time of day. Measuring with a basic lux meter or a smartphone app is a practical way to check the level at the surface of the specimen.

