
How to Style Glass Domes: A Complete 2026 Guide
Table of Contents
- What You'll Need to Style Glass Domes
- How to Preserve Insect Specimens for Display
- Choosing the Right Base and Scale for Your Glass Dome
- Shadowbox vs Glass Dome Display: Which Suits Your Space?
- Step-by-Step: Styling a Glass Dome with Natural Elements
- Lighting, Trays and Tablescape Placement Ideas
- Cleaning and Maintenance for Long-Lasting Displays
- Conclusion
- Frequently Asked Questions
Last Updated: September 17, 2026
What You'll Need to Style Glass Domes
Learning how to style glass domes starts with a short, inexpensive kit. A glass dome is a transparent cover, usually glass or acrylic, that sits over a wooden base to protect and frame a display inside. At Newman Art Designs, we've shipped these displays across Australia since 1996, so we know what makes a dome look considered rather than cluttered.
Gather these before you begin:
- A dome with a fitted base, in glass or acrylic
- Reindeer moss or dried moss for ground cover
- Small dried flowers, seed pods or preserved foliage
- Tweezers and a soft brush for placement
- A lint-free cloth and distilled water for cleaning
- Fairy lights (battery-operated) if you want subtle glow
A common mistake is buying the dome first and the contents second. Work out what you're displaying, then match the dome to it. The Australian Competition and Consumer Commission product safety guidance is worth checking before buying imported glassware, particularly for anything electrical used alongside it.
How to Preserve Insect Specimens for Display
Preserving insect specimens for display means drying and stabilising the body so it holds its shape and colour for years. Museum practice relies on controlled drying, pinning and sealed enclosures rather than chemicals a home hobbyist can't safely handle.
The practical sequence:
- Relax the specimen so joints move freely without snapping
- Pin it into position on a foam board, spreading wings flat
- Dry it slowly in a warm, well-ventilated space away from direct sun
- Seal the finished piece inside a dome or shadowbox
Rushing the drying stage is the most common error. Specimens dried too fast become brittle and lose colour within months. This is why museum-quality preservation matters: the enclosure does as much work as the preparation. Newman Art Designs uses museum-quality preservation techniques precisely because home drying rarely holds up over time.
Choosing the Right Base and Scale for Your Glass Dome
Scale decides whether a dome reads as a sculptural display or a cluttered jar. The base should be slightly wider than the widest element inside, leaving a visible margin of empty space around the specimen.
Use this sizing guide:
| Dome Size | Best For | Placement |
|---|---|---|
| Small (under 12 cm wide) | Single small butterfly, desk display | Shelf, desk, bedside table |
| Medium (12-20 cm wide) | Butterfly pairs, small arrangements | Side table, coffee table |
| Large (20 cm+ wide) | Multi-specimen groups, centrepieces | Console, dining table, mantel |
Base material matters too. Wooden bases suit rustic charm and vintage aesthetics; darker finishes make pale specimens stand out, while light timber softens bold colours. If you're building your own, a simple MDF base painted and sealed is a cheap DIY option, though it won't match the finish of a purpose-built base.
Shadowbox vs Glass Dome Display: Which Suits Your Space?
The choice between a shadowbox and a glass dome comes down to viewing angle and wall space. A shadowbox is a deep, wall-mounted frame; a glass dome sits on a surface and can be viewed from every side.
| Feature | Shadowbox | Glass Dome |
|---|---|---|
| Viewing angle | Front only | 360 degrees |
| Space needed | Wall space | Surface space |
| Protection | Fully enclosed, low dust | Enclosed, needs dusting |
| Best for | Small apartments, gallery walls | Shelves, tables, centrepieces |
For anyone in a small apartment with limited surface area, a shadowbox wins on practicality. For a coffee table or sideboard where the piece is meant to be handled and turned, the dome is the better call. Many collectors use both: domes for statement pieces, shadowboxes for wall groupings.
Multi-butterflies in a XLarge Glass Dome →
Step-by-Step: Styling a Glass Dome with Natural Elements
Styling a glass dome with natural elements follows five steps: build the base layer, place the focal point, add texture, balance the arrangement, then close it up. What separates a dome that still looks good in two years from one that fogs, moulds or fades is what happens before you lower the glass, so treat the steps below as a preservation sequence, not just a styling one.
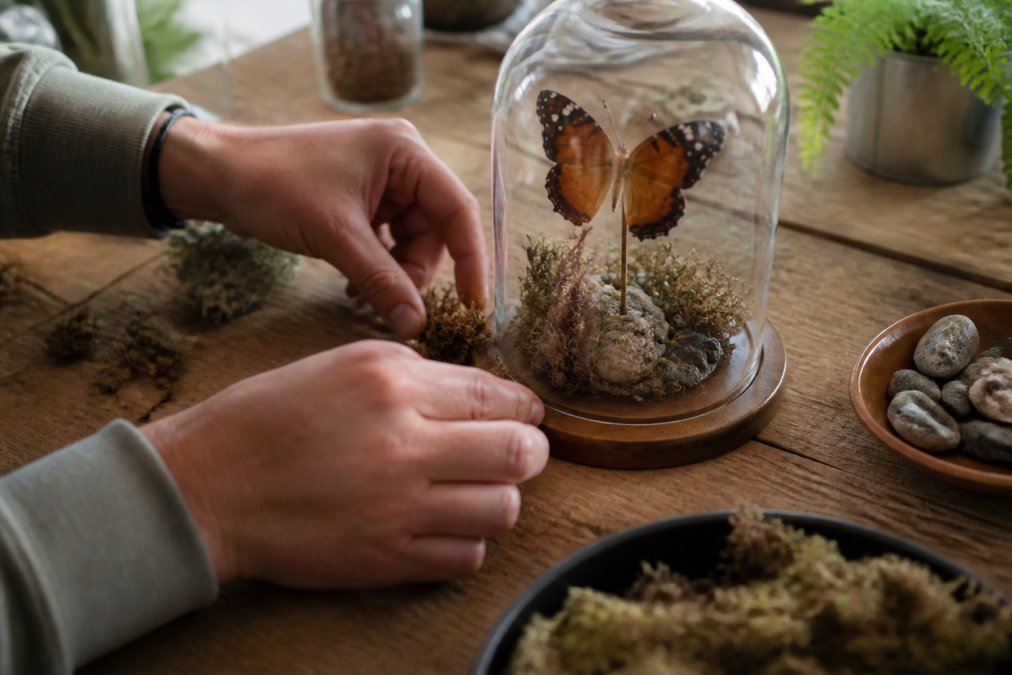
- Build the base layer. Spread reindeer moss or dried moss across the base, keeping it slightly uneven for a natural look. Reindeer moss is the safer choice for enclosed domes because it is already dried and low in residual moisture; fresh moss or garden-collected material holds water and is the most common cause of condensation forming on the inside of the glass within weeks.
- Place the focal point. Set your specimen or centrepiece slightly off-centre. A useful rule of thumb is to position the focal point about one-third of the way across the base rather than dead centre, perfect symmetry reads as assembled, not styled.
- Add texture. Tuck in dried flowers, seed pods or small stones to break up the moss. Keep organic additions to materials that are fully dried; anything with sap or moisture will encourage mould inside a sealed dome.
- Check visual balance. Step back. If one side feels heavy, add a small element to the opposite side. Aim for roughly two-thirds of the visual weight on one side and one-third on the other, a 2:1 ratio is the pattern most stylists default to.
- Seal and position. Lower the dome gently, then place it where light hits it from the side rather than above. Before sealing, give the base and contents 24 hours in a dry room to release any residual moisture; this single step prevents most of the fogging people blame on the dome itself.
The whole process takes about 20 minutes for a small dome. If you're styling a ready-made piece, like our Multi-butterflies in a XLarge Glass Dome, you're mostly adjusting placement and surrounding decor rather than building from scratch.

Lighting, Trays and Tablescape Placement Ideas
Placement and lighting decide how often a display actually gets looked at. Side lighting, from a window or a small lamp, brings out wing structure and depth that overhead light flattens. Most guides stop there; the practical problem is how to add light without ruining the piece or the glass.
Placement options that work:
- Trays: Group two or three small domes on a tray for a curated collection. Keep the tallest dome at the back so it doesn't block the others.
- Books: Stack two or three art books and rest a dome on top for height. A dome wider than the book stack will overhang and look unstable, so match the base to the stack footprint.
- Baskets: A shallow woven basket softens the base and adds texture layering. Line the basket with a felt pad so the wooden base doesn't scratch.
- Tablescapes: One dome as a centrepiece, offset with candles or a small vase. Keep supporting objects lower than the dome's midpoint so the eye lands on the specimen first.
Cleaning and Maintenance for Long-Lasting Displays
Cleaning a glass dome takes five minutes a month and prevents the slow haze that ruins otherwise beautiful pieces. Dust the outside with a lint-free cloth, and use distilled water rather than tap water to avoid mineral streaks.
Conclusion
Styling a glass dome well comes down to scale, placement and restraint, and those are the details most guides skip in favour of pretty pictures. If you'd rather start with a piece that's already preserved to museum standard, Newman Art Designs offers handcrafted domes and shadowboxes with free shipping across Australia, backed by preservation techniques refined since 1996. Browse the collection, or start with a small dome and build your display from there.
Frequently Asked Questions
What can I put inside a glass dome?
Glass domes suit preserved insects like butterflies, beetles or scorpions, as well as dried flowers, moss, small shells or a single sculptural object. For a nature-inspired look, a preserved butterfly on a wooden base works well because the dome protects delicate wings from dust. Keep contents dry and avoid fresh plants, which trap moisture and can damage specimens.
How do you clean and maintain glass domes for insect displays?
Dust the outside of the glass with a microfibre cloth and a little water or glass cleaner, never spraying directly onto the dome. Inside, use a soft dry brush to remove dust from the base and specimen. Keep the dome out of direct sunlight and away from heaters to prevent fading. Handle by the base only, and lift the dome straight up rather than twisting it.
How do you arrange preserved specimens inside a glass dome?
Start by placing your largest specimen slightly off-centre, then build around it with moss, small stones or dried botanicals to create texture layering. Leave breathing room so the specimen stays the focal point. Check the arrangement from all angles before securing anything, and make sure the tallest element sits at least 1-2 cm below the dome's top.
What is the difference between a shadowbox and a glass dome display?
A shadowbox mounts specimens against a flat backing inside a framed box, which suits wall hanging and saves surface space. A glass dome sits on a base and can be viewed from every angle, making it better for three-dimensional pieces. If you have limited wall space, a small dome on a shelf or desk works well; if you prefer a gallery wall, choose a shadowbox.
